Ohhh this is really my favorite season! I really can't get enough of AUTUMN. the leaves that slowly change color, the fresh air. long walks on the beach when the wind blows just too hard, slow walks through the woods. Enjoy all the scents and colors of the nature around you. The smell of the forest, the smell of rain. I LOVE the rain and yep I even love to walk in the rain. And what should not be missing are pumpkins! Soup! Pumpkin spice coffee and there's bound to be a pumpkin flavored chocolate!
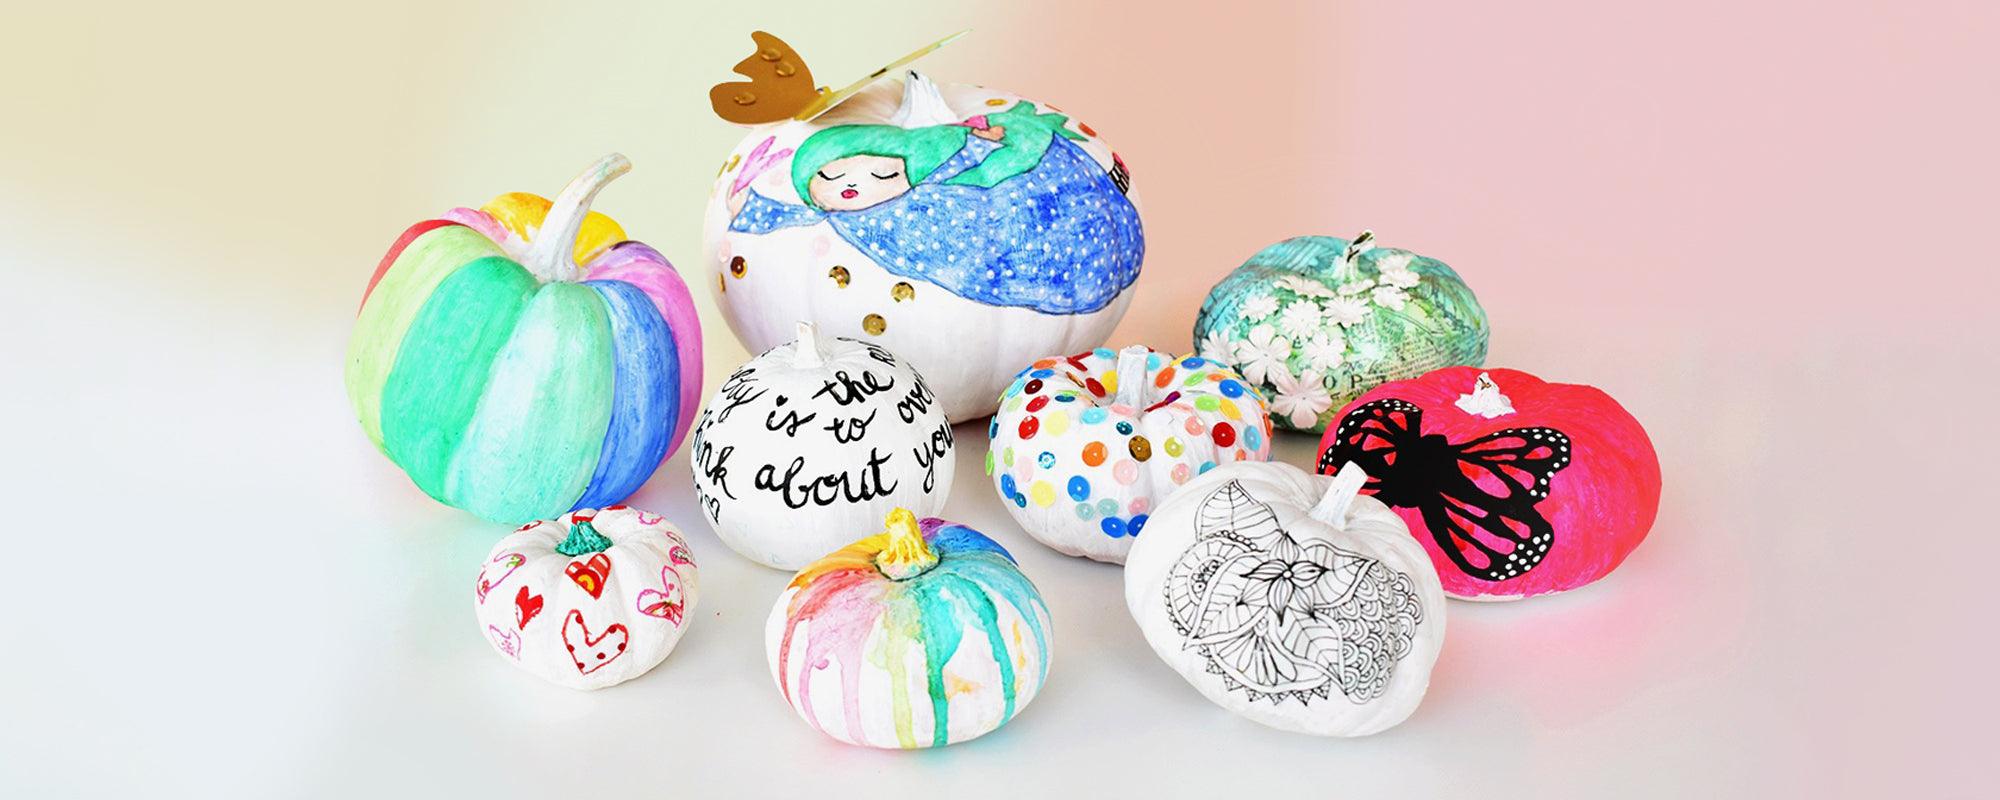
So, are you ready: Pimp your Pumpkin DIY?!
In the photo below you can see what you need as a 'basic'. And if you have any nice DIY materials of your own, use them!

The basic necessities for pimp your pumpkin
I have also indicated what you need for each pumpkin.
- watercolor set (this is the size of Winsor & Newton )
- gesso
- all different types and sizes of pumpkins
- black pen, like this one Micron or a black posca pen
- sequins
- tacky glue
- White paint or puffy paint
- hearts from scraps of fabric
- gelatos from Faber Castell or other crayons such as the Neocolor from Caran d'Ache
For my local friends: I bought all these cute pumpkins at: De Veense Bukker . You can of course buy them at any kind of plant/garden store in your area. Buy them in all kinds of different sizes and types. It makes absolutely no difference whether they are 'perfect' or not. After all, you're going to pimp them!
To ensure that the paint stays on your pumpkin, it is better to give them a base coat of Gesso. I've used my Liquitex gesso, but any kind is good enough. With that you paint your pumpkin, and use as many layers as you want. If you paint them over with a layer of opaque acrylic paint, then 1 layer of gesso is sufficient. But if you want to use watercolor or your pen, for example, and you don't want the pumpkin color to show through, you may need 2 or 3 coats of gesso.
Pumpkin with girl
On the biggest pumpkin I brought, I wanted to draw a girl “Revlie-style”. This is how you do it:
- add at least 2 layers of gesso to your pumpkin
- draw a girl on your pumpkin with a pencil (do you want to learn to draw girls, I have a course for that, more info can be found HERE ).
- color in the girl with your gelatos (or other crayons/crayons). I used the gelatos directly on the pumpkin and then spread it out a bit with a dry brush and a tiny bit of water)
- make lines with a pencil, I drew the eyes, nose and mouth with a black posca pen. be careful not to pierce your pumpkin!
- glue some sequins with tacky glue (or any other kind of "everything glue"
- I colored the girl's leggings with a black posca pen. the white of her leggings is just the gesso that shows through).
- I bought the butterfly from Ikea! At their decoration/stationery department.
- use white acrylic paint or Puffy Paint from Tulip to make the white dots on her dress

rainbow pumpkin
I like this one so much because the pumpkin 'stripes' are perfectly spaced for this rainbow!
- use your gelatos directly on your pumpkin (or so crayons, crayons, poscannen etc)
- use a dry brush and sometimes a drop of water to evenly distribute the color

Fluorescent Pumpkin
This cute pumpkin was really tricky to photograph because the paint is fluorescent! In reality, this one hits you with a bang!
- after your layer of gesso, paint your pumpkin in its entirety with pink fluorescent paint;
- draw a butterfly on your pumpkin
- color your butterfly with black paint
- use some red watercolor to color parts of the wings
- use white acrylic paint or puffy paint to dot the dots.

Hearts pumpkin
This was my smallest baby pumpkin, perfect for a little love of fabric!
- cut small hearts from scraps of fabric;
- stick them on your pumpkin with gel medium
- go around the edges of the hearts with a red or pink posca pen
- color the pumpkin stem with green watercolor

Quote pumpkin
Sometimes all you need is a nice quote and some watercolor :-)
- Use a brush that you can write well with. and otherwise a posca pen or other black marker!
- write your favorite watercolor quote on your pumpkin
- my quote is “the real difficulty is to overcome how you think about yourself” by Maya Angalou

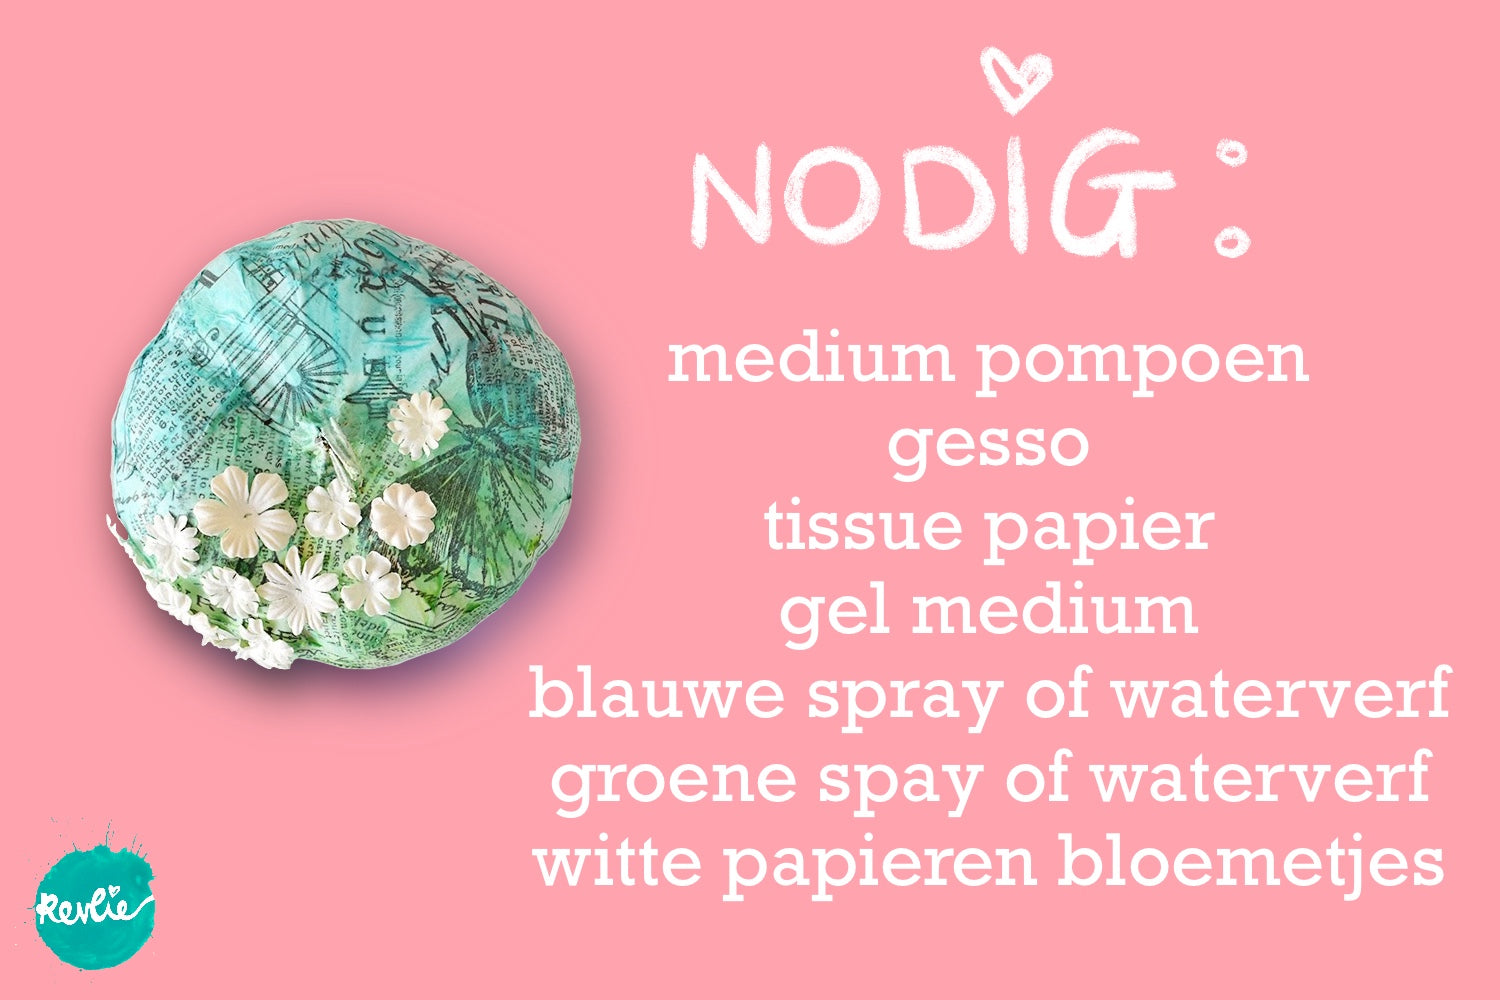
Pumpkin flowers
Of course you can also use tissue paper (handkerchiefs) to cover your pumpkin completely!
- tear some pieces of tissue paper into smaller pieces
- stick them on your pumpkin with gel medium until all the pieces of your pumpkin are covered
- spray with some green and blue spray paint
- then stick some white flowers on it with tacky glue or 'everything glue'.
confetti pumpkin
The simplest of all and it will make you super happy just looking at it!
- stick all your sequins onto your pumpkin randomly with tacky glue or all glue and you're done!

doodle pumpkin
Another simple pumpkin to make, but still great to look at!
- grab your black posca pen or other fineliner, and doodle away! I chose to kill only part of the pumpkin. Of course you can also fill your entire pumpkin with doodles.
- maybe you like colored doodles much more: do what makes you happy!

Droopy rainbow pumpkin
- get your best watercolor!
- I simply applied some watercolor on top and let it run down color by color.
- start with yellow & let it drip down, add orange & let it drip down, add red, etc!

So...what are you waiting for?! Are you also going to get started with this Pimp your pumpkin DIY? I just think you have more than enough hobby materials to fill at least 20 pumpkins hehe. I'm very curious what you make, leave it to me and Happlify feel free to see, we like it!
Oh, and yes, these pumpkins perish of course! They will eventually collapse and rot. But yeah, that's what it is. Then they go to jail and we make other fun DIY's! And if you really don't want it, buy Styrofoam pumpkins! You can bring it back every year!
creepy pumpkin
My daughter Sanne made a nice creepy pumpkin, as a big fan of Stephen Kings' IT. Brrrrr, glad it's in her room (it's made of styrofoam, so it says 'cosy' all year round), she thinks Pennywise is the end. Sleep well!

Revlie is a full-time creative entrepreneur. She goes for it every day and is happiest when she can be creative in her studio. And... you can too! Because Revlie also makes the most beautiful online workshops to get started creatively yourself. Her motto: you can do ANYTHING you want, as long as you put in the effort! Check next to Revlie.nl certainly also Thecreatieveplayground.nl
Do you also like to inspire others? Do you want to write or visualize about finding happiness in small, simple or logical things? click here


Interesting? Share with someone:
Does art make you happy? Tips for buying and selling art
Get ready for fall with this free smartphone wallpaper